Videography is very similar to photography. If you are familiar with one, you probably won’t have troubles with the other. The results depend on the lighting and on your camera settings. Adjusting the gain (sensitivity), iris (aperture) and shutter speed is what you work with.
Photography can overcome the limitations of low light quite easily. A long exposure is all you need. Set the camera on a tripod, adjust the settings and wait for the camera to do the rest. This does not apply to low light settings where its mostly dark, but you also have bright light sources.
Videography is very different to photography in this regard. You simply cannot opt for the long exposure. If you opt for 25 frames per second, each frame needs to be exposed for at least 1/25 of a second. This means that you are restricted by the shutter speed.
Your options are to change the iris (aperture) or the gain (sensitivity). Your iris is, of course, limited by the lens. There is only so much you can do in this regard. You can also make the camera sensor more sensitive to light by altering the gain setting. This is your best option, albeit the results depend a lot on your camera sensor.
There are major differences between camera sensors. Firstly, as discussed in a previous essay, physically bigger sensors typically give you better results in low light. Secondly, not all sensors are the same, even if they are the same size. Some technologies simply give you better results.
In practice
Videography is much more difficult than photography in low light conditions. If you understand why that is the case, as explained above, you may want to focus your efforts on photography, as opposed to videography.
I am, however, quite the optimist. I am well aware of the limitations, yet I want to see how it all works in practice. I have been doing that for quite the while for now and the results have been rather expected.
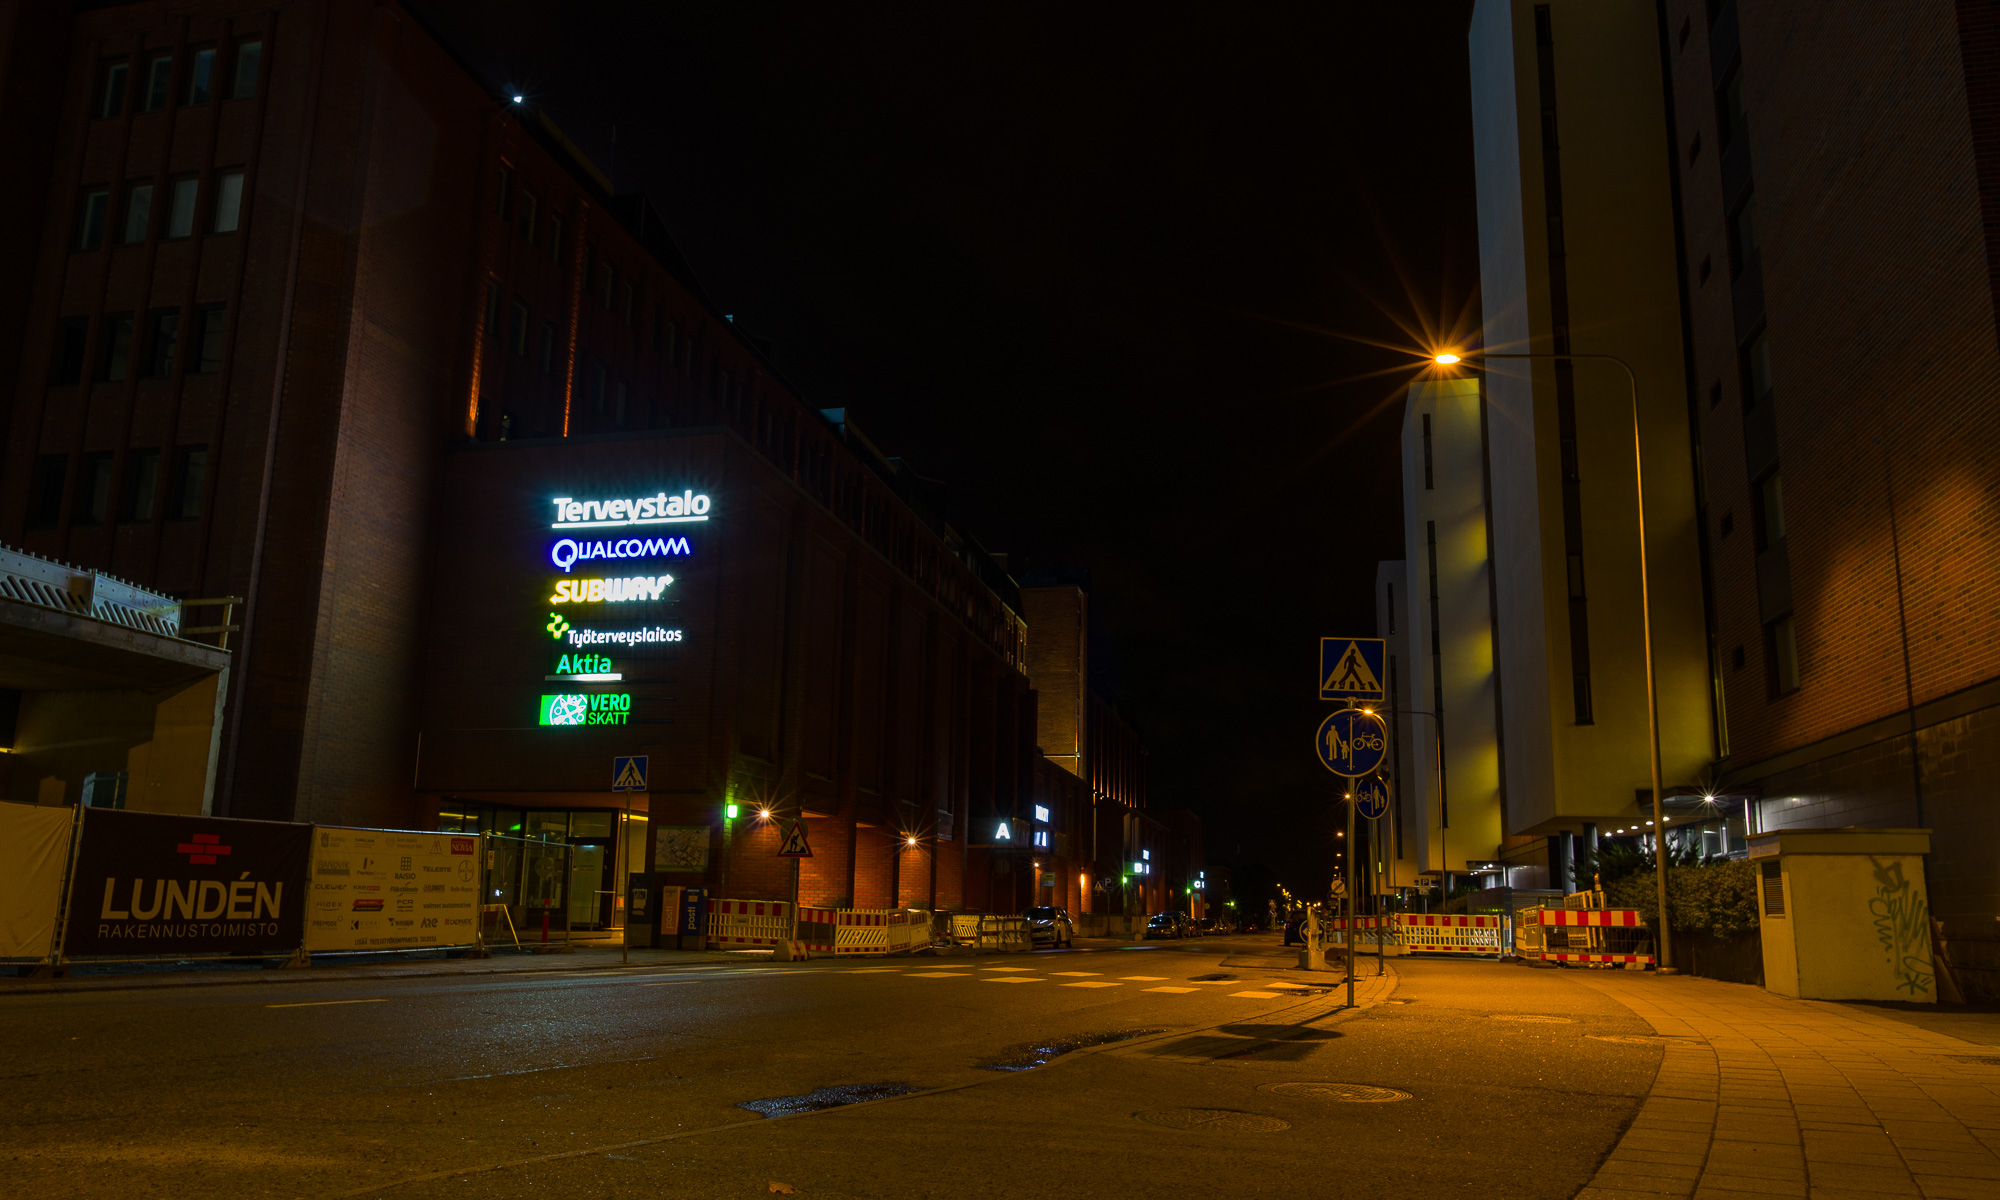
I want to understand in how little light the cameras can perform. In most settings there will be fairly bright light sources and you can expect reasonable results. The problem in such settings is that the areas that are lit will look as expected, but the rest fades to black.
What really interests me, however, is photography and videography in settings where there are no light sources, only ambient lighting. This interests me because, in my experience, the human eyes outperform cameras in low light conditions. I therefore opted to take the cameras for a walk at a trail that is located in a nearby forest.
Results
Starting with very small sensors, I first tried an action camera, a GoPro Hero 7 Black. The major advantage of an action camera is that you can strap one to your head and get stable footage. In my first trial, I simply had the wrong settings. The best my action camera could achieve was capturing the contrast between the tree line and the night sky. After noticing that I had limited the sensitivity considerably, I altered the settings accordingly. However, the camera performed worse at higher sensitivies. The results are unusable.
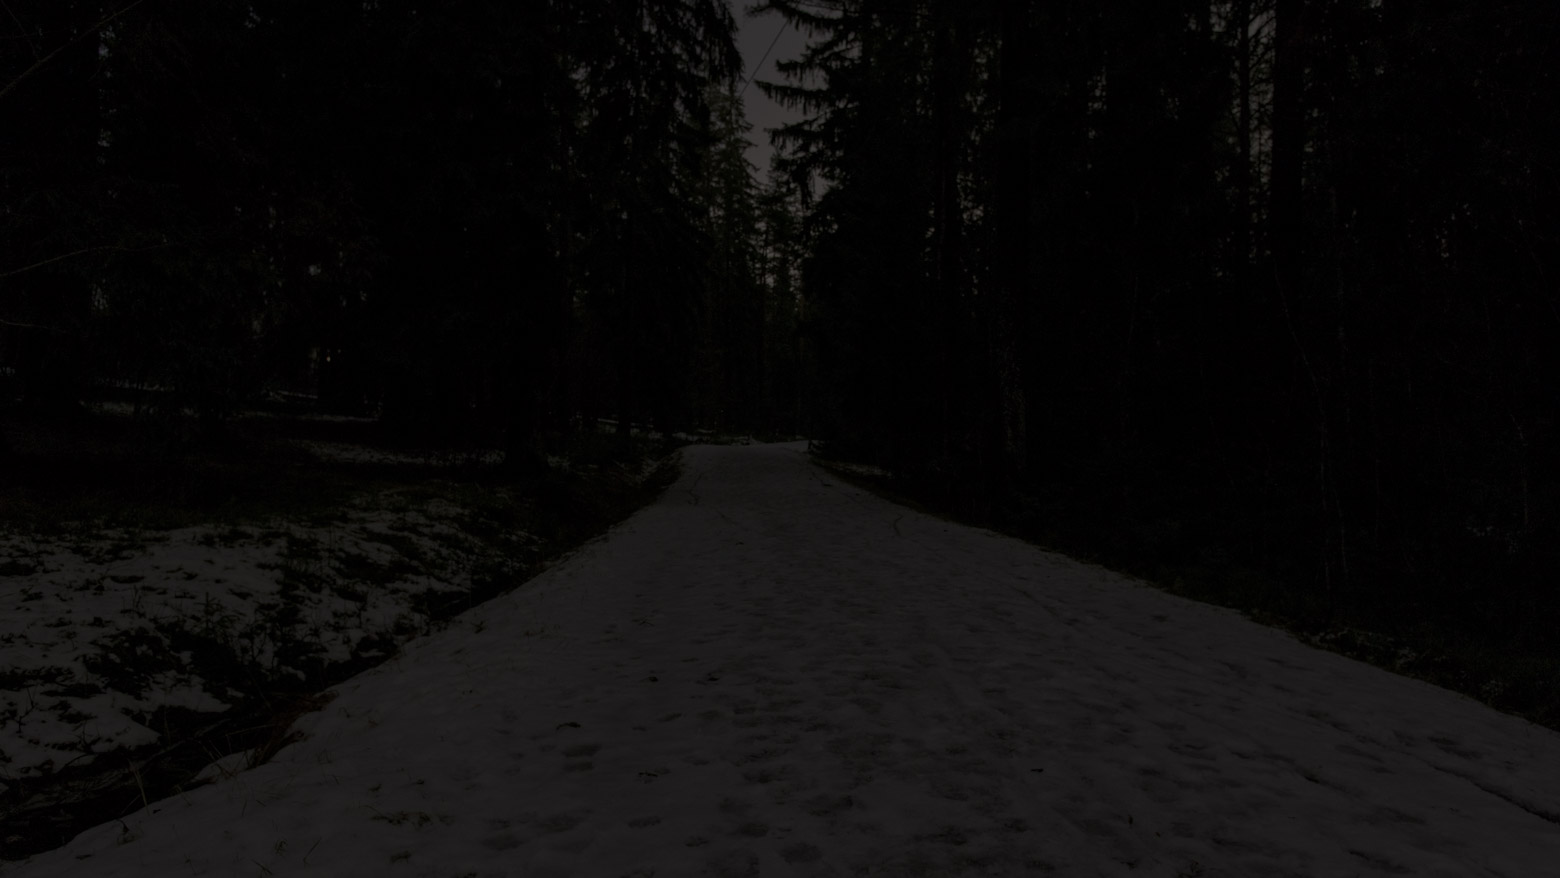
I then tried my camcorder, Sony FDR AX-700. I pushed it to its limits, maxing the gain (ISO 10 000). The results were not impressive. The footage was relatively stable handheld and I could distinguish the treeline from the night sky and the snowy trail from the forest. The camcorder provided much better results than the action camera, likely due to the larger sensor, but I cannot say that I would have much use for such footage. As you can see, it looks okay in low resolution, but the results are unusable in high resolution.
Forest trail on November 23.11.2023 (Timo Savela / CC BY 4.0).
I then back went for another walk to test a DSLR with a larger sensor. I forgot that the Pentax K-3 II could not be pushed much in the video mode (ISO 3200). I then opted to take long exposure photos, to see how much the quality improves when one does not need to resort to higher sensitivities.
Forest trail on November 24.11.2023 (Timo Savela / CC BY 4.0).
I need to point first that I have cropped the second photo, changing the aspect ratio from 3:2 to match the 16:9 aspect ratio commonly used in videography. I also tried my best to match the way the human eye sees the trail. This is, of course, my rendition of the low light conditions and based solely on my memory.
The camera did an excellent job capturing the colors and the detail. It was, however, arguably too excellent. If you push the photo in post-processing, you can make it look like as it was day time, even though I was there videographing between ten and eleven and then returned with the DSLR after midnight.
I had to make the photo look muted. The human eye struggles with colors and detail in the dark, so I had to lower the saturation and contrast considerably. However, it also has impressive dynamic range, so that there are plenty of greys, going from near white to very dark grays. There are also areas that are simply black, without any detail, but I found it very difficult to render the photo in a way, retaining plenty of greys, while also having those deep blacks. Either the dark greys end up too black or the light greys end up too white. I think it is also difficult the render how the ground and anything close to you has more detail, while the trees and anything distant has less detail.
Perhaps I could have done a better job, had I fiddled with the settings more, but as it was past midnight already, so I headed home again. In any case, while none of this was, perhaps, particularly productive, it is something that I find particularly interesting. If only people could see what I see when I go for a walk, but at least so far I have not been able to pull it off. It is fascinating how we are so accustomed to light even at night time that it is easy to forget how well we can see in the dark.
PS
On my way back the first time, I heard a noise. I was going through a residential area, but as it was quite late, past eleven, and the conditions were icy, there was no one around. Anyway, I thought something moved to my left. I turned to look and there it was, a roe deer, staring at me. It was in no hurry and did not seem to mind my presence. I was able to put on my action camera, but the footage was not good. Then noticed that there was another deer. I managed to grab my camcorder from my bag to get some better footage.
Landscape photography typically involves wide-angle lenses and many landscape photos have been taken on camera that rests on a tripod, to maximize the overall quality of the photo, as well as to help with the composition. However, even wide-angle lenses have their limitations. You can only go so wide, which is particularly the problem in tight quarters.
Combining photos
It is possible to overcome the limitations of having to fit in everything in one photo by simply taking more photos and then combining them. This is typically done on a computer, following the photography, but it is possible to this in cameras that have a panorama feature (digital cameras are, in fact, computers). In essence, multiple photos are merged to form a larger photo. This computational approach is generally known as image or photo stitching.
To keep this practical, I will not get into the specifics of how it all works. To be honest, I am not an expert in how this is done, how the algorithms work, and therefore I would not be even able to explain it to you. What I want to achieve in this post is to explain how it all works, in practice, and to elaborate its advantages and disadvantages.
Overlap and consistency
There are number of things that need to be taken into consideration before you attempt to compose one photo from a number of photos. These things need to be taken into consideration at the very beginning as otherwise you will have to do it all over again.
The important thing about stitching is that requires photos that overlap with one another considerably. In other words, you need plenty of redundant information for a computer to process. This should be easy to comprehend by imagining yourself combining multiple very similar images by hand. If there is very little overlap, it is difficult to stitch them together into a coherent whole. If there is plenty of overlap, this is much easier.
Another important thing is to use fixed settings. Using the sweet spot of your lens, which means that it is important to know your camera and lenses, and the lowest sensitivity setting is advisable, considering that this is about maximizing the quality, making it easy as possible for the computer to do the stitching. The shutter is not as important in daylight conditions. Low shutter speeds may result in fuzzy people in the photo, which may or may not be to your liking, depending on your preference.
In addition, it is highly important to fix the focus. You can initially use the autofocus, before the first photo, but then it needs to be set on manual focus. The purpose is to avoid changes in the depth of field between the photos. The idea is to keep it all the same.
If you have rapidly changing lighting conditions, e.g., a partially overcast sky, you may run into some difficulties later on. You may consider adjusting the photos in post processing, to match one another as closely as possible, if that happens. In my experience, it does not matter that much. The stitching software seem to be capable of handling it. I would, nonetheless, try to avoid major differences in the exposure, which is possible if you use manual settings and wait for the ambient lighting to remain consistent long enough for you to avoid any potential hassles down the road.
Staying parallel or rotating
You also need to consider whether you will be attempting to stitch a linear panorama or a rotational panorama. In the former, the distance between the camera and the subject remains the same. In practice, this means that the camera only travels sideways.
Staying parallel
Imagine that you are photographing a wall covered in graffiti, but you simply cannot fit it all in. You could cover it from an angle, but that is hardly an ideal solution if you want to analyze it all later on. There is a better solution.
Position yourself at the edge of the wall. Then step away from it, backing, fitting the wall in the viewfinder (or the screen on the back of the camera) vertically. It is time for the first photo, followed by stepping to the side, let’s say to the right, and then it is time for another photo. You repeat this procedure until you reach the other end of the wall. Once you are done, the computer will do the rest.
The idea behind this is that, assuming the distance between the camera and what you are photographing, remains the same, as it does with a wall (assuming it does not, for example, curve). You could then simply merge the photos, one by one, in post-processing. It would be easy to stitch it together, to render a composite photo out of the photos, because there would be considerable overlap and as the geometry remains the same.
In an ideal setting, this would be as simple as measuring the distance between the camera and the wall, from one end, and then from the other end, followed by marking these spots and drawing a line between them. You would then remain at the same distance as the camera moves sideways.
Height may prove to be a problem, especially in tight quarters. There is, however, a solution to this. In this imagined example, if the wall would not fit in the frame vertically, you would simply take multiple photos at different elevations, while the distance remains the same. The photos are then arranged in relation to one another, so that they overlap both vertically and horizontally.
Measuring the distance and drawing a line on the ground or setting up a string, a thin rope, or a wire between two poles would do the trick. Then you would move place the camera on a tripod, with its center moving along that that line, in order to maintain the distance from the wall.
In practice, pulling this off is much more difficult than it seems. Simply maintaining the distance is quite difficult. There are not that many places that are designed this in mind and the ground is hardly ever even. In addition, you might be in people’s way.
If you want to make sure that everything is accurate as possible, set up a rail and then move the camera on it horizontally. To take tight quarters into account, you can change the elevation of the rail. It is, however, unlike that you will be working with rails. Firstly, rails are expensive. Secondly, the setting one up is impractical.
I have tried this approach, in very tight quarters and made it work. I could not maintain the exact distance as I would have been too close to what I was photographing, a plywood wall, and blocked people’s path. I was able to stay as far as possible, while maintaining more or less the same distance from the wall and then make it work on a computer. Therefore, I can vouch for this. It is all about consistency and it does work, as long as you know what you are doing.
To be honest, I have only had relative success with this. I have only been able to combine a handful of images. Beyond that it simply does not look good. In my experience, it is simply so difficult to find even ground outdoors that the more photos you combine, the more errors you are going to run into.
To stay positive, I would say that being able to combine a couple of photos is, in itself, a win, because the more photos you combine in this way, the more impractical it becomes to view the composite photo. It becomes so wide that it is not possible to view it on a screen in a way that makes much sense, no matter oh wide your screen is. Furthermore, the file size ends up being impractically large. I actually ran into an issue where, had it all worked out, the composite photo would have had so many pixels that it would no longer have been possible to save it in a file format that can be viewed without specialized software.
I am aware that there are certain ways of overcoming such obstacles, by, for example, saving the composite photo in a way that deconstructs it and then reconstructs it, piece by piece, as you are viewing it. That is how some map software works with the satellite imagery. That is not, however, very practical in research as the purpose is to showcase what one is dealing with and then to analyze it.
Rotating around an axis
Imagine that you are photographing a square, from one of its corners or its sides. You seek to cover up to 180 degrees. At the center of the square, you may seek a full 360-degree coverage. In this case the key thing is not to move the camera, only to rotate it. You can do this even without a tripod, on a monopod or even handheld, assuming that the lighting conditions are adequate and you know what you are doing, but I recommend doing this on a tripod. The process is then easier to control. Again, it is all about consistency.
I would argue that this kind of rotational panorama is easier to pull off than a linear panorama, inasmuch as you have a tripod and know how to use it. You will not be moving the tripod, except between panoramas, which means that it is unlikely that you will run into any issues. You do, of course, have to set up the tripod and level it first. If you do not know how to do that, it is as simple and, at times, as frustrating as adjusting the tripod legs. Other solutions include using a level base in between the tripod and the tripod head, a half ball tripod head and a tripod that has a bowl to accommodate for that design, or a self-leveling tripod.
You can check the results with a bubble level. Many tripods have them built in, but you can also buy them separately. Your camera may also have built in level indicators. If you want to be sure, check the results yourself. If the horizon changes, you should adjust things accordingly. Also, make sure that your camera lens is not facing down, nor facing up. This simply means that your tripod head and/or the plate that it rests on should be leveled both horizontally and vertically.
Centering
To be clear, you do have to make sure you that everything is centered. You need to inspect your camera and your tripod. I will work you through in that order.
The first thing to check is whether your camera can be mounted on a tripod. Most cameras have a tripod socket at the bottom of the camera. It is typically located below the camera sensor, to make adjusting things on a tripod more convenient, but it might also be positioned elsewhere. Smaller cameras or camera bodies have less real estate, so it makes sense for the design team to have it placed elsewhere or to simply not include it. If it is not located at the bottom of the camera, below the sensor, you need to make horizontal adjustments, which is an extra hassle. If there is no socket, you may need another solution. For example, smart phones have clamp holders. I would not, however, recommend a smart phone, because the lens placement forces you to make extra adjustments. The second thing to check is the tripod socket standard.
The third thing to check is whether tripod head has an adjustable plate (commonly known as a quick release plate), so that you can move the camera move back and forth on top of the tripod. That allows you to fine tune the placement of the camera on top of the tripod. If your camera body is going to be horizontal, a simple ball head may work just fine for you. I do, however, recommend a tripod head that comes with an adjustable plate.
The fourth thing is to check the tripod head screw thread. It should be the same as the one in your camera. The most common thread is the 1/4″, but larger cameras use a sturdier 3/8″. Some tripod heads account for both, so that as you as attach the camera to the tripod head, it slips down to account for the smaller threads, but that is pretty rare. You will most likely be using a camera that has a 1/4″ socket and a tripod with 1/4″ screw, so this is unlikely going to be an issue. There also adapters and some plates account for both sizes in their design, so this is unlikely going to be an issue.
The fifth thing to keep in mind is to gently attach the plate or ball head with the screw to the socket, as your camera manual most likely will remind you. Some cameras have plastic sockets or base plates that accommodate the socket, so while it is unlikely that anything will ever go wrong, it is possible that something will go wrong if you use too much force. Your fingers should do the trick. You do not need to use the whole wrist to fit in a small screw into a socket.
To be clear, the center is the lens entrance pupil, not the center of camera body. If you intend to keep the camera body horizontally and the tripod socket is where you expect it to be, below the sensor, no horizontal adjustments are needed. You only need to adjust the camera a bit back on the tripod head. If the lens you use is short wide-angle lens, it may well be that you do not even need to do this adjustment. In my experience even older software can handle such a minor discrepancy.
I use the SMC Pentax-DA 15mm F4 ED AL Limited, which is a super wide-angle prime lens, designed for APS-C sensors, and have basically no issues it, whatsoever. It is, however, a noticeably slim design, protruding just a hair shy of four centimeters from the lens mount. The camera tripod mount is another four centimeters back from the lens mount, so my guess is that the lens entrance pupil is one to two centimeters from the mount. Even without any adjustment, it is close enough for the software to have little to no issues with it.
If you are using a bigger lens, you may run into issues and then you need to do some adjustments. That should not be a problem though. All you need is the right equipment and some patience. This is, however, a good reminder to everyone that bigger is not always better in photography. Smaller is at times better, in the sense that it is often more convenient.
What you then need to do is to simply adjust the camera on the tripod, moving it back a bit. You should be able to move the camera on the quick release plate and/or on the tripod head that the plate attaches to. That probably gets where you want to be. It may take a bit of fiddling with it, but it is not that difficult. It is now all about patience.
If you are not getting good results, it means that you need to make sure that the lens entrance pupil is aligned correctly with the tripod. The easiest way to check this is to have the camera on the tripod and use the back screen of your camera to check if subjects in the field of view appear closer or further away as you rotate the camera on the tripod. If things keep changing in the live view mode, then further adjustments are needed.
If you want to avoid having to keep fiddling with it, get a tripod head and plates designed for fine tuning. You can then see how many millimeters you have adjusted things, and on what axis, is going to be a major time saver. Once everything is in order, you can make notes of the distances on that setup and rely on those later on. For that you do, however, need a sturdy tripod head that allows fine tuning, back and forth on one plate, sideways on another plate. If you are opting to position the camera body vertically, then you also need a so-called L bracket. It is basically an L shaped quick release plate which allows you to switch back and forth between horizontal and vertical set ups.
Your camera and lens do not have to be the top of the line, as I noted in my posts on budgeting. The same applies to the tripod. A cheap tripod with a slightly adjustable quick release plate might be just enough for your purposes. To be honest, I have winged it horizontally, on a monopod, and even handheld, rotating the camera in between my fingers, nesting the pentaprism at the top and the bottom between them, and the results are nothing short of spectacular. Not knowing that, you would not know how hacky it was.
This is not to say that a sturdy tripod, a solid tripod head and a set of plates and brackets are not useful. They are. It is as simple as that. They do, however, come at a price. If you want something nice, like all by Manfrotto, it is not going to be cheap. Their bundle that contains the head and the plates costs approximate 500 to 600 euro. You also need the tripod itself for that, so, in total, you will be spending closer to a 1000 euro on that setup. If you have a lot of use for it all, it makes sense to have right gear for it. Plus, if you have ever handled gear made by them, like just an aluminum quick release plate, you know what I am talking about. There is a certain feel to them.
Goofs
Many, if not all of the problems that you run into with panoramas can be solved. The best way to tackle them is to be consistent. It takes a lot of patience, but the results speak for themselves. Here is an example of what I was able to do on a monopod not long ago:
Turku Market Square on May 22, 2022 (TYKL/dg/7991; Timo Savela / CC BY 4.0).
Overall, the results are excellent. The quality is simply much better than what is needed for research purposes. It is worth emphasizing how little effort this took. Based on the file information, the photography took me only five minutes. I then had the software, in this case Microsoft ICE, to compose this photo from 56 horizontal photos, covering the entire field of view twice, and it took only about two minutes for the software do that. To be clear, you do not need that many photos to cover 360 degrees, not even if you are taking vertical photos. This took me some ten minutes in total, if we allot a couple of minutes to post-processing, namely to fine tuning the exposure. Had I been more sensical about this and taken fewer photos, I might have been able to do this in about five minutes.
The only easy to detect problem that I notice with this composite photo is that a couple of people have been multiplied in the stitching process. Can this be avoided? Yes. It is possible to avoid it. The easiest solution is to avoid crowded places. That is not, however, a great solution if you are interested in panoramas of crowded places, such as city centers. A better solution is to pick a time of the day is not particularly busy (my preference; I like to avoid people, because the research subject is the landscape, not the people, who, in fact, end up obstructing the landscape). Then again, if you interested in panoramas of busy areas, then that is not a great solution either (empty area that is known to be busy just seems odd).
One solution to this is manual stitch. The problem with it is that it is time consuming. While I am fond of manual processing of photos, one by one, I would also like to point out that the longer you have been a photographer, the more you start to appreciate an optimized workflow. This means that you do not want to spend hours and hours on something, which no one but you and, perhaps, one of your colleagues is ever going to notice.
I would say that I am known among my colleagues as the person who cannot stand it if things are not upright in photos, nor things that protrude into photos from the sides. To me, it is simply poor composition. I sometimes have to live with it, if the photo happens to be the only one from that situation, but, to be clear, it really, really annoys me that I did such a poor job. It is, however, only me who takes issue with such as most people who end up seeing such poorly composed photos simply do not care about such. Even my colleagues do not really care, because they know that it happens and that there is not a whole lot one can do about it. You can rotate and crop in order to keep things appearing partially in the frame, but that is only a partial solution that often results in other things ending up appearing only partially in the frame.
If you ask me, it is not time well spent if you work on a photo for hours on something that most people do not notice, nor care about. You also have to take into consideration that no one might ever see that photo. It might exist, uploaded somewhere, but it might never be seen by a human. As everyone has a camera these days, photos are dime a dozen.
This is only made worse by how niche panoramas are in photography. While there is no shortage of software dedicated to panoramas, it is not part of the mainstream. The software is either very simplistic, which means there is little control over the process, or unnecessarily complicated for the uninitiated. If you ask me, you do not want to dedicate your time to manually composing panoramas. It is simply not worth it.
I believe that you also need to take into consideration the purpose of the photo. If you are interested in panoramas, you are most likely interested in the landscape and not the people in the landscape. So, if your panorama has a goof which results in the duplication of a person or an animal, for example a seagull, it does not even matter because its purpose is to depict the landscape, not people. It can look silly, but that is about it.
Another solution to this is to use a neutral density filter during the daytime. It will make it possible to have longer exposure times (slow shutter speeds), which will, in turn, blur people, making them largely indistinguishable from one another. I would say this is more of an aesthetic choice though. Some prefer to stop the motion because that blur can come across as eerie. Others prefer the blur, because it makes the otherwise static world seem more alive. It might, however, be your preference as it emphasises the landscape (the research subject), while avoiding looking odd (that, somehow, there is no one in a busy area).
If you are interested in nighttime panoramas, this will unlikely be a concern for you. Here is the same view in the dark, processed with the same software:
Turku Market Square on May 24, 2022 (TYKL/dg/7992; Timo Savela / CC BY 4.0).
Again, the results are stunning and the effort that went into this is a matter of minutes, not hours. You do have to have the camera on a tripod, but otherwise the process is the same. This time I was a bit more sensical about it and limited myself to only 25 photos. Once again, the photography took me only five minutes. Setting up the tripod and leveling it took me about ten minutes. Working with a tripod, I do not believe I could have done that faster. Then there was the fine tuning in post-processing, which takes a bit more time with nighttime photos, and running the same panorama software that did what it did in half a minute. In total, this took me about twenty minutes.
It is also worth noting that as the exposure time is much longer than it is during the daytime, people will either simply not be registered in the photos or appear blurry, ghost like, due to the long exposure time. This is a good thing if you wish to avoid having the people in panorama. It is, however, not a good thing if you wish to have them in the panorama, for example, to showcase a vivid nightlife. In this case this was not an issue as there was hardly anyone there due to the ongoing renovations at the time.
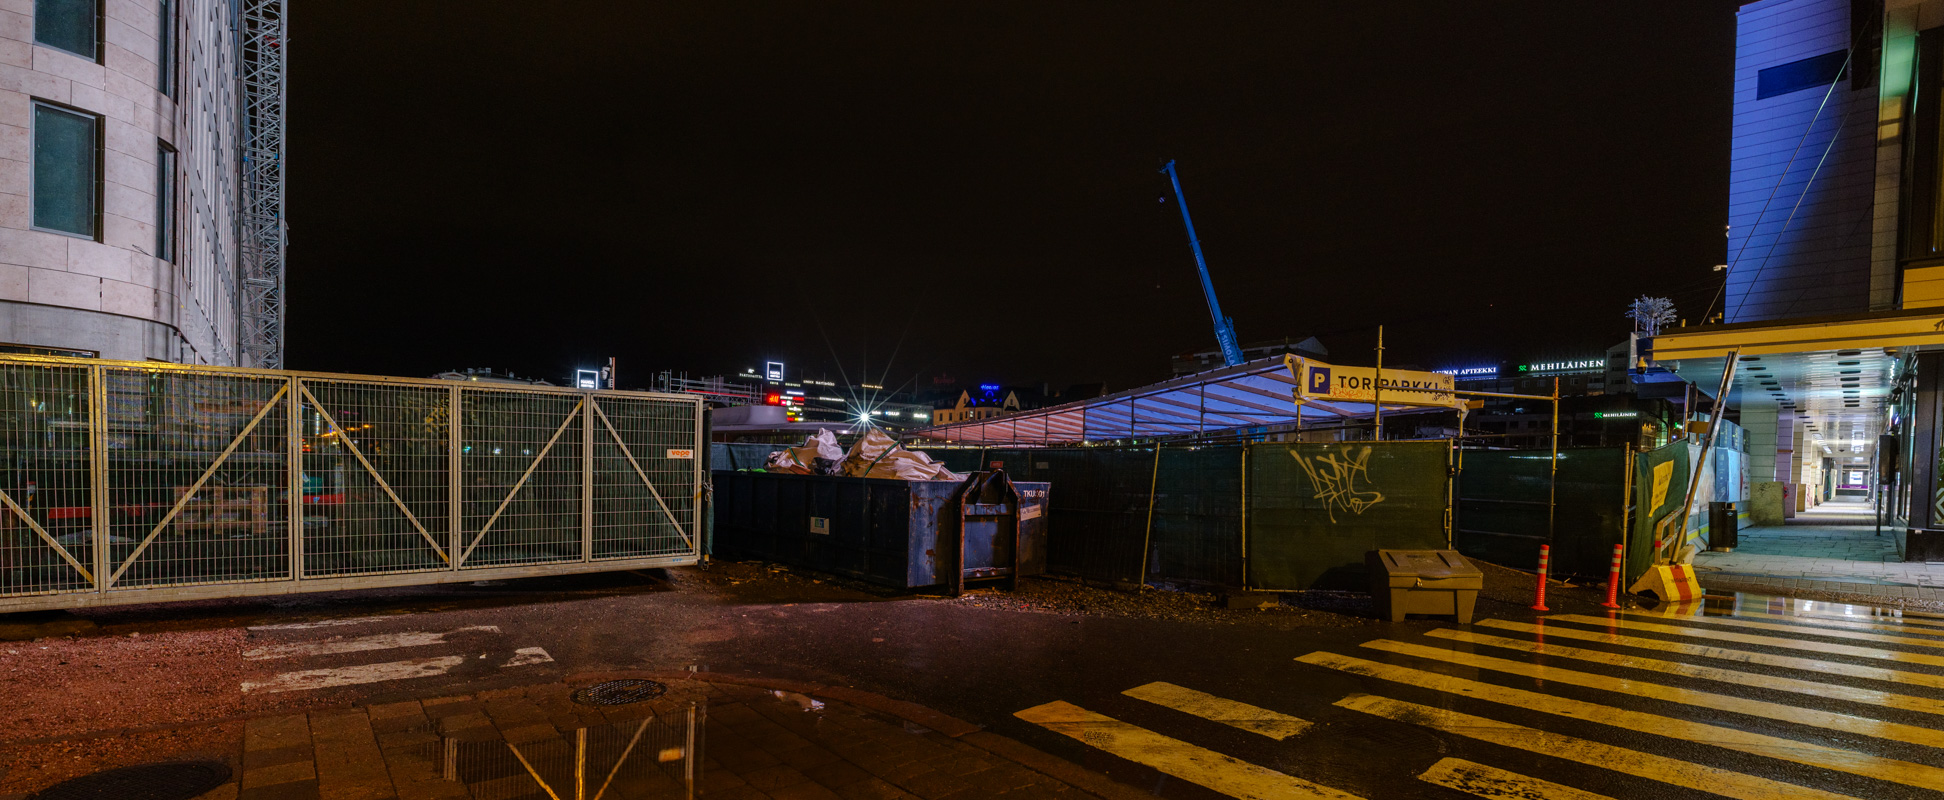
You may, however, still end up with some goofs even at nighttime, such as in this one:
Turku Market Square on May 8, 2021 (TYKL/dg/7836; Timo Savela / CC BY 4.0).
You may not notice the goof, as the culprit is not in the photo, but the cover on this walkway has two different color casts with a sharp boundary between them. To my understanding, this is caused by a massive video screen on the side of a building which projects different colors to surrounding materials that then appears on the photos. In most cases the photos are stitched to one another from their sides, taking into account the areas of overlap, and therefore it only makes sense that may end up with goofs like these.
I try to avoid goofs, but they crop up at times. I respond to such by having a laugh, while acknowledging that I am probably the only person who will ever notice it. It is, however, also a learning opportunity (and why I kept them, instead of redoing them). It is difficult to avoid such goofs if you have never encountered them, simply because you have never attempted to make it happen.
In my experience, the only way to avoid these kinds of goofs is to have enough photos to work with. For example, had I spent more time on the first panorama, certainly more than that five minutes, I believe I could have done much better and managed to eliminate such goofs, while still not spending hours on one panorama.
Stitching problems
You may not notice anything, but there is a stitching issue in the first panorama. That means that the pixels from one photo do not neatly align with the pixels from another photo. You probably will not notice that at a glance, but you can detect it (it says ‘Turuun’ instead of ‘Turun’ on a sign at a rooftop), and similar cases if you know what to look for. Rooftops are often the place to spot them. You may also find misaligned tiles on the ground.
One of dealing with such issues is not to care if it is difficult to even notice the error. I do, however, tend to care, so I would only use such landscape panoramas with clear stitching errors for educational purposes like this, to make you aware of them and to explain how you can avoid them.
How to avoid stitching issues? Well, in my experience, the better your setup is, the easier it is to avoid them. It may seem counterintuitive, but using a lot of photos with plenty of overlap may cause you more problems than only a handful of photos with less overlap. Why? Well, related to the goofs, because the stitching software needs to define where to merge the photos. If there is a lot of movement, people coming and going in each photo, the software will have hard time figuring out where to draw the line.
To avoid such issues, you would rather not have people coming and going. Then again, the problem with that view is that if there are no people in a panorama of a crowded place, it will not come across as a panorama of a crowded place.
Bottom line
Panoramas are useful as they help to illustrate a much wider view than what a wide-angle lens can provide. You do not need to flip through a number of photos as you can see it all at a glance. Plus, panoramas are, in fact, fairly easy to compose. You do, however, need to be patient in order to be consistent. In addition, I think you also need to be aware of the issues that you might face, such as the goofs that I mentioned in this post.
It can, of course, take a bit of getting used to. It is easy to small mistakes and then you have to do it all over again. Think of it as a process. I certainly did not think that I would run into various goofs before I started doing panoramas, but as I am now more aware of them, I am better equipped to handle them. I am also fairly fast because I have spent countless hours in the dark, fiddling with the camera settings, testing what works and what does not work. It allows me to dial in the settings at the spot, so that the photography may only take me some five minutes per panorama. If you are starting out, do not expect great results immediately, nor to be that quick.
For the best results, use a tripod. It will help you to avoid goofs and stitching errors (where things are not perfectly aligned). Of course, if you do not have the time, nor the space for it, then you will have do your best without one.
It is also worth noting that panoramas that are composed of multiple photos are not mutually exclusive to photos that are not composed in this way. Composing them for the sake of composing them is no better than photographing something for the sake of photographing it. If it serves a purpose, then it is a useful tool in your toolkit. Otherwise it is somewhat gimmicky.
You also have to consider how rare it is to see a platform that caters to a very wide format. Articles are a poor fit due to the traditional layout. It is the same with websites, including this blog. Most of the potential of panoramas remains untapped because of this. Therefore, I would say that in most cases traditional photos are much more useful to you and to others.
In this post I want to explain why opting for raw data, followed by processing the data yourself, is better than using your camera to process that data for you, despite its convenience. I will not explain how you can process that data as that is then up to you do, as you see fit, with the software of your choice. Cameras and software are alike in this regard. What matters is that you get the results you want, not the brand or the company behind that brand.
Does raw data even exist?
There is a book edited by Lisa Gitelman. Its title is ‘“Raw Data” Is an Oxymoron’. The title builds on what Geoffrey C. Bowker states in his book ‘Memory Practices in the Sciences’. He (184) argues that “[r]aw data is both an oxymoron and a bad idea” and that “data should be cooked with care.” We could, of course, reply to that by stating the exact same thing, that cooked data is an oxymoron and a bad idea, considering that to cook something requires something uncooked, i.e., raw. Otherwise, it will not make much sense.
Gitelman expands on Bowker’s view alongside Virginia Jackson in the introduction to the book that mentions raw data in its title. For them (2) all data is “always, already ‘cooked’ and never entirely ‘raw.’” They (2) go as far as to state that “[i]t is unlikely that anyone could disagree” with Bowker’s view, only to acknowledge that, oddly enough, data is more important ever. I believe they are right, but I also think that they are wrong.
They (2) clarify the problem with raw data by stating that “starting with data often leads to an unnoticed assumption that data are transparent, that information is self-evident, the fundamental stuff of truth itself.” In other words, the problem with it is that it is deemed to be objective. They (3) list a number of verbs that we typically associate with data, such as collecting, entering, compiling, storing, processing, mining and interpreting, only to add that, in fact, even in cases where we think that we are not interpreting the data already, we are, in fact, already interpreting it. In short, we are actually generating data when we are examining something, as they (3) remind their readers.
While I agree that, strictly speaking, everything is cooked, to a certain degree, as emphasized by them (3), I think that they might be overlooking why people refer to something as raw and then something else as processed. To use the cooking example, while you can eat raw potatoes and thus could say argue that they are, in fact, therefore cooked, having been cooked by the earth, most people would still refer to them as raw and opt to cook them.
Raw potential
To connect this discussion to photography or, to be more accurate, digital photography, it is common among photographers to differentiate between raw and processed file formats. To be clear, raw images are not even images. They only become images once they are processed. They therefore hold the potential to be images, but they are not images themselves.
To make more sense of what I just stated, if you set your camera to save files in raw format, you can inspect them on your camera. That would seem to contradict my earlier statement. However, that is not the case. This is simply a matter of convenience. The camera does exactly what it is supposed to, saving the file in a format that is technically not an image, but it also processes that file into an image, applying some default settings, or whatever settings you have chosen or customized through the camera menus. This makes it easier for you to assess whether that file is worth keeping or not. That image or photo that you see on the back of your camera is not, however, the raw file itself. It is merely an image created from that data, as processed by the camera.
You can also set the camera to do the exact opposite, so that you get only an image, but not the raw file. The camera file format is then typically set as jpeg (also known as jpg), short for Joint Photographic Experts Group. Some cameras do not even allow you to save that raw. They operate the same way as cameras that do allow this, but they simply discard the raw data after it has been processed into an image format that one would typically refer to as a photo.
It is worth keeping in mind that digital cameras are computers that are capable of saving files in formats that is immediately usable, e.g., in jpeg format, or potentially usable, e.g., raw formats. Many, but not all photographers prefer the latter over the former because it allows them to process the data the way they want to, on a computer other than a small camera, on a screen much larger and higher resolution than the one that can be found at the back of one’s camera. Moreover, they also prefer the raw format because it allows them to process the data in more than one way, even years or decades later.
To be clear, you can also process the immediately usable files, such as jpegs, but then you are processing something that has already been processed. In many cases it is not an issue, but you would rather process something that is yet to be processed instead of something that has already been processed. A major difference between the jpegs and raw files is in the file size. The former are compressed, whereas the latter are not, because they serve a different purpose. Think of the jpegs as the final photos that have been processed in a certain way and in a format that does not a lot of disk space and bandwidth. If you care for the image quality, you prefer to use software to process the raw data for a specific purpose, instead of what has already been processed from that data.
If we want to retain that cooking analogy, raw imaging data, saved in raw file formats, is uncooked. In fact, it is not only raw, like a potato, it is inedible, unlike a potato, which can be eaten, not that I would recommend that. It is usable. It can be cooked, like a raw ingredient, over and over again, infinite number of times, unlike a raw ingredient which can only be used once. This allows you can try different things with it, by simply changing the recipe.
The processed image file, i.e., the photo, is cooked. It is ready to be eaten. It can be further cooked, but it may result in it being overcooked. If you want the food to be as tasty as possible, you start from the beginning, using fresh ingredients. This is not to say that using leftovers or simply reheating food does not have its merits. It might not be as tasty, but it gets the job done. It is still nutritional and takes much less time than starting from scratch.
What is raw anyway?
To be clear, this does not mean that Gitelman and Jackson are not right, nor that Bowker is not right, because, in a sense, they are. I will not get stuck on the details as it is enough to point out that digital photography involves an analog to digital conversion that is, by no means, 1:1 conversion. We might say that the raw data is virtually unprocessed, but it is not actually unprocessed. Something is lost in the process. Then again, we may counter that by acknowledging that it is also the case with human vision.
A good example of the limitation of both photography, be it analog or digital, and human vision is that the dynamic range (DR) is always limited. A digital camera can typically handle 14-bits of data, which means 14 stops. The human eye can easily beat that, operating at 20+ stops, let’s say 20 to 30 stops, but that is because it does not function the same way as a digital camera. While it is fair to say that human vision is much better than a digital camera, at least in this regard, it is equally unable to provide us raw visual data. In fact, it is also cooked.
It is also worth noting that not all cameras and lenses are alike, as I have discussed in my previous posts. They are certainly very similar, but the differences do impact the data they are able provide us. This then impacts what you can do with that data, what kind of images you can process from it.
To stay on the cooking analogy, no ingredient is, strictly speaking, raw. They do not simply exist in raw form, simply waiting for us to cook them. For example, something as simple as potatoes do need the right environment to grow and that environment impacts them accordingly. We need to consider temperature, moisture, the soil quality, the mineral and organic nutrients, etc. In addition, we need to consider the farming practices. Once the potatoes are ripe, they become the raw ingredients. It is, however, worth also noting that the potatoes can be harvested sooner or later, opting for the delicious, but small new season potatoes, or letting them grow even more, for those mid and late season potatoes that are bigger, but less tasty.
The problem with raw is that it is often assumed to be the starting position, something that is not at all processed, even though there is no such thing. Even the raw needs to ripen before it is cooked. Even the unprocessed needs to be processed in order to be post-processed, which is the term typically used in photography for the processing of raw files on a computer other than the camera. It is an apt term because that data has already been processed, much like a potato is processed as it ripens underground.
Pragmatics vs semantics
To summarize the problem identified by Gitelman and Jackson (2), typical arrangement of raw vs. cooked is that it assumes that we have these fixed states where something is either raw or cooked, as discussed by. Raw is then heralded as objective, transparent and self-evident information, “the fundamental stuff of truth itself”, as noted by the two (2-3). While I agree with them in that regard, I think that it is equally problematic to state, as they (2) do, that “data are always already ‘cooked’ and never entirely ‘raw.’”
The problem with stating that all data is cooked is that holds on to that binary. As everything is cooked, everything is to be treated with suspicion. There is this lament to it. Raw is retained, but as something unattainable.
If we consult a dictionary (OED, s.v. “raw”, adj. and n.), it will tell us that it can also be something that is often ‘un-something’: “unprocessed”, “unrefined” or “only partly refined”, “unbaked”, “untreated”, “untanned”, “undressed”, “unfinished”, “unfulled”, “untucked”, “undyed”, “uncut”, “unpolished”, “undistilled”, “undiluted”, “unmalted”, “undried”, “undeveloped”, “unmitigated”, “unused”, “unripe”, “unfamiliar”, “inexperienced”, “unskilled”, “untrained”, “crude”, “uncivilized”, “coarse”, “brutal”, “not yet (statistically) analysed or evaluated”, “unadjusted”, “uncorrected”, “unprotected” and “undisguised”, to name just about anything that seems relevant to this.
If we look at how the word is used, as this ‘un-something’, there’s no strict binary to be found. One might refer to sugar as raw, as noted in the dictionary (OED, s.v. “raw”, n.), but we do not need a dictionary to tell us that sugar does not exist in raw form. It needs to be extracted from something else, typically from sugar beet or sugar cane, which, in turn, need to be grown and ripened first, much like the potato.
To me, objecting to raw data, on the grounds of it all being cooked, is akin to stating that everything is therefore fake. It relies on this semantic distinction between what is raw and what is cooked. I believe that is much more productive way to think of those words as not in semantic terms, having a fixed meaning, but in pragmatics terms, so that what is raw or cooked depends on the context.
Bottom line
Choosing between a processed or an unprocessed file format is up to you. Opting for the former, typically for the jpeg format is fine, inasmuch as you know its limitations. Simply put, you are limiting yourself quite considerably as you can only further process the photo that has already been processed. Opting for the latter, typically for a raw format, gives you much more room to work with. You simply have more to work with.
Raw formats do, however, take much more disk space than the processed jpegs. This is not really an issue if you only to store only a handful of photos, but it becomes an issue if you plan to store more than that. You will want to invest in storage if you prefer the raw formats.
Having the camera do the processing for you is much more convenient than doing it yourself. You can also adjust the camera processing, by changing the camera processing settings. This gives you some control over the processing. That control is, however, limited by the camera software, which typically gives you only a handful of options to adjust the processing. Moreover, you are working with a tiny, low resolution screen, which makes adjusting the settings inconvenient.
I have my cameras set to raw by default because I want to do the processing on a desktop computer, in front of a large screen. Others are not as fussy and are happy with the processed photos as most people would not even know the difference. You are free to choose, to opt for raw or jpeg. You can also opt for both, opting for raw or jpeg selectively.
It is worth noting that the combination of darkness and bright lights is very difficult for the cameras to process. I therefore recommend opting for a raw format and processing that raw data yourself, if you are interested in nightscapes. I have managed to pull of good jpegs of nightscapes, after fiddling with the camera settings, especially the HDR modes, but, overall, I think the best results can be achieved by opting to do the processing of that data yourself.
References
Bowker, G. C. (2005). Memory Practices in the Sciences. Cambridge, MA: The MIT Press.
Gitelman, L. (Ed.) (2013). ‘Raw Data’ Is an Oxymoron. Cambridge, MA: The MIT Press.
Gitelman, L., and V. Jackson (2013). Introduction. In L. Gitelman (Ed.), ‘Raw Data’ Is an Oxymoron. (1–14). Cambridge, MA: The MIT Press.
Oxford English DictionaryOnline (n. d.). Oxford, United Kingdom: Oxford University Press.
Camera bodies come in different prices and sizes, with different features, the bottom line being that there are many things to take into consideration. Much of this is also applicable to lenses, which means that there is no such thing as the best lens.
What is a mount?
A mount, or, more specifically, a lens mount is the interface between the lens and the camera. If you take a look at a camera body allows interchangeable lenses, it is the metallic, shiny ring on the front of the camera body. There are different types of mounts, of which the bayonet type is the most common these days. The idea behind its design is simple. You take a compatible lens and insert it to the camera body. The camera body and the lens typically have a mark, such as dot, to indicate how they should be aligned with one another at that point. Once inserted, you then turn the lens in the right direction or the body in the opposite direction, as guided by the lens mount, as you can only go one direction, until you hear a click. That means that the lens is aligned correctly and locked in place. There is a small button somewhere next to the lens mount, on the camera body, that releases the pin holding the lens in place.
While different cameras may share the same type of mount, such as the bayonet type, the specific mount limits what lens can be used with that camera. To keep things simple, you are only supposed to use the lenses designed for that lens mount. You can, of course, use any lenses that are compatible or made compatible with the mount.
In most cases this is a relatively simple matter. You check the lens mount of each camera body and each lens. If they are the same, they are compatible. If they are not the same, they are not compatible. In some cases, it is, however, possible to make them compatible. The simple case involves the use of adapters that operate in between the two. The less simple case is having the lens mount changed by someone who knows what they are doing.
Adapters, a quick fix?
There are two key things to keep in mind when opting to use an adapter. Firstly, not all lenses can be simple adapted to be used with certain camera bodies. Each lens mount has a flange focus distance or FFD, which indicates the distance between the mount itself, i.e., the ring on the camera body and the corresponding in on the lens, and the sensor inside the camera body. As a rule of thumb, you cannot use lenses that have a shorter FFD on camera bodies that have a longer FFD (without resorting to optical adapters), whereas you can use lenses that have a longer FFD on camera bodies that have a short FFD (with a simple adapter that adds extra distance to match the FFD). Secondly, lenses made for certain lens mounts correspond to different sensor (or film) sizes. This means that while you can adapt just about any lens to work with just about any camera body, lenses are typically designed to cover only a certain (sensor or film) frame size. Therefore, if a lens is designed to cover a larger frame size than the camera body frame size, you will have full coverage of the frame with that lens. However, if the opposite is the case, if a lens is designed to cover a smaller frame wise than the camera body frame size, you will not have full coverage of the frame with that lens. In practice, this means that you can adapt a large- or medium-format lens to function with full-frame and APS-C camera bodies, a full-frame lens to function with APS-C camera bodies, while having full frame coverage, but not vice versa (you will have to crop the resulting image or use a crop mode on the camera, as you will get little to no light on that area of the frame).
There are also other considerations. Lenses can be adapted from one system to another, even autofocus lenses, but the results may vary. In some cases, you can even adapt manual lenses to operate as autofocus lenses.
If you have mirrorless interchangeable-lens camera (MILC), you can adapt almost any lens made for single-lens reflex cameras (SLRs), regardless of whether are from the film era or from the digital era, because its FFD is bound to be shorter than the FFD of the lenses designed for those other systems. Of course, you need an adapter for that and the results may vary as you are, indeed, adapting something designed for one system to be used with another system. For some people this is the charm of it. They want to try glass that might not be the best in its class, but has a certain look to it, as flawed as that might be according to others.
In terms of convenience, a lens designed for the system is much more convenient to use than a lens adapted from one system to another. I have little experience in lens adapters, having only used an M43 to Pentax K-mount adapter (screw-threated type lens mount to a bayonet type lens mount), and while I can confirm that it works, as intended, it is far from convenient.
Bigger is better?
While you can use lenses designed for larger systems (larger frame sizes) on smaller systems (smaller frame sizes), it does not mean that results are simply better than with lenses designed for those smaller systems. Firstly, and perhaps most obviously, an optically inferior, yet larger lens will not produce better results than a smaller but optically superior lens. Secondly, lenses designed for a certain system are optimized for that system. Simply put, the magic of larger systems (such as medium-format) is in that film or sensor size, not in the lenses.
In a sense, bigger tends to be better in terms of quality, as I explained in the previous post, but using lenses designed for larger systems does not mean the results are better. In addition, these lenses tend to be fairly expensive, heavy and most likely require an adapter if you wish to use them on smaller system.
The upside of using a lens designed for a larger system is that the smaller frame covers only portion of the frame the lens was intended to cover. Lenses tend to perform weaker in the corners on the rectangular frame than in the center as the lens itself is round. This means that you will, most likely, have poorer resolution in the corners than in the center of the frame. You will possibly also see some vignetting, so that the corners appear darker than the center of the fame. You mitigate these issues by operating at the center of a lens designer for a larger system. This does not, however, necessarily mean that the overall results are better as the quality of lens and the sensor output are what matters.
Smaller is better?
To be clear, simply because bigger is not necessarily better, it does not mean that smaller is better either. What really matters is how the lens performs on a camera body, how a certain lens designed for a certain frame size performs in comparison to other similar lenses designed for the same frame size or to other similar lenses designed for other frame sizes.
In practice, one should be comparing the results that one gets from a lens with the same focal length and the same aperture on systems that share the same frame size (film or sensor size). The bigger lenses will typically outperform the smaller lenses in the same class. It is also likely that the results have less distortion and other optical quirks.
The problem with bigger lenses is that are often more expensive than their smaller counterparts. If you use these lenses in good lighting, stopping down, utilizing the sweet spot of the lenses (in my experience often at around f/8 on APS-C, where their corner-to-corner resolution is maximized), prior to diffraction affecting the quality negatively, you will get comparable results, minimizing the difference between lenses.
The bigger and the more expensive lenses are not, however, designed to be used only in this way, in optimal lighting conditions. They are expected to perform also in difficult lighting conditions, when one cannot rely on the lens sweet spot. This also means that they tend to have a smaller achievable f-number than the smaller and cheaper options. The lens simply needs to let in more light in order to perform in low lighting conditions. Letting in more light also allows the lenses to be used more creatively, to achieve a shallow depth of field (in effect, the subject is in sharp, in focus, while the background is blurry, which gives it three dimension and, sometimes, a dreamy look). This is often also the reason why the lenses are as big and heavy as they are.
Bottom line
Not unlike in the previous post on camera bodies, it is difficult to give clear recommendations on lenses. Like camera bodies that have many features that may or may not be relevant to you, lenses also have many features that may or may not be relevant to you. In this post, I only covered what you should be taking into account when buying lenses.
If we combine the discussion with the previous post, you first need to consider the camera body, to account for whether it is suitable for what you will be using it, and for the lens mount that restricts you to it, at least in terms of convenience. Then you need to think what kind of lenses you need for your purposes and whether they are available for that camera body. If they are not available for that camera body, then you may have to consider another camera body.
If you are photographing landscapes, you will most likely be looking for wide-angle lenses. A good one will likely cost you some hundreds of euro, whereas an excellent one will likely cost you anything between a thousand and three thousand euro, depending on the sensor size and the camera manufacturer. If you opt to shoot on a tripod, in order to maximize the quality, the difference between the good and the excellent, not to mention the okay, the good and the excellent, is bound to be marginal. This means that you can get very good results without spending a month’s salary on a lens. Of course, you still need to account for other factors, for example weather sealing, but I believe that it still holds that you can get very good results, even on a tight budget.
These larger and more expensive lenses also tend to be designed to be in adverse weather conditions. The materials used to construct them, and to weather seal them, mean that the lenses will be bigger, heavier and more expensive than the smaller and cheaper designs.
I pointed out in the summary part of the post that covers the basics (sensitivity, aperture, and shutter speed) that what matters the most in photography is that you know what you are doing. I also noted that most cameras can get the job done.
There is an old adage among photographers pertaining to the best camera. It is quite simple. The best camera is the one you have. It is pointless to argue that this and/or that camera could provide you better or the best results if you do not have that camera. Even if you have the best camera in the world, it does not matter if do not have it when you need it. If you need it, right now, and it is tucked away at home, it is of no use to you, there and then. If all you have is your smart phone with you to get the job done, then that is what you must use to get the job done. It is that simple.
It does not matter a whole lot whether you use a Canon, Nikon, Olympus, Pentax, or Sony camera, to mention the well-known brands. I am quite confident that you can also get the job done by using a Fuji, Panasonic, Ricoh, or Sigma camera. I would also be highly surprised if a Hasselblad or Leica camera could not get the job done, assuming that you have that kind of money to spend on cameras. Even a high-end smart phone that allows you use the phone camera in a manual mode might able to get you good results even in demanding conditions. Night time is certainly very demanding, but once you know what you are doing, it is not as demanding as it may seem at first.
To be clear, in this post I will focus on camera bodies, not on lenses. To keep things tidy, I will write about lenses in a separate post.
Bigger is better?
To be clear, photography is not cheap when you need a camera that can perform in demanding conditions. As a rule of thumb, bigger is better. Then again, bigger is also more expensive. How much more expensive?
To give you answer to that, I first need to explain what bigger means in this context. Simply put, physically large cameras tend to have physically larger sensors which generally outperform physically smaller sensors that are typically housed in physically smaller cameras. But why is bigger better?
Bigger is better because large sensors tend to have relatively high pixel pitch, measured in µm (microns or micrometers), when compared to small sensors. This is, of course, relative as you can have a large sensor with more pixels than a small sensor with fewer pixels and still have the same pixel density. The advantage of a large sensor is that the pixels can be physically large, while still providing plenty of resolution (typically indicated in megapixels). Conversely, smaller sensors need to provide enough resolution, which tends to compromise the pixel size. But why does pixel size matter?
Pixel size matters because you can fit more or fewer pixels on a sensor depending on their size. The smaller pixels increase the resolution, whereas larger pixels increase the amount of incoming light per pixel. Simply put, bigger is better because a large sensor will gather more light than a smaller sensor, assuming that the sensor is not crammed with pixels.
I think it is, however, better to explain this the other way round. Small sensors are very capable. They are, however, limited by their physical size. To fit in some industry standard number of pixels, which is currently something between 20 to 30 megapixels, means that the pixels have to be relatively small. For example, the Olympus flagship camera, the OM-D EM1X houses a fairly small sensor (17.3×13.0mm) capable of 20.40 effective megapixels, which means that its pixel pitch is 3.32 µm. In comparison, the Nikon flagship, the Nikon D6, houses a much larger ‘full frame’ sensor (35.9×23.9mm) capable of 20.80 effective megapixels, which means that its pixel pitch is 6.43 µm. It is no surprise that the Nikon flagship will provide better results than the Olympus flagship, especially in demanding conditions, because, in this case, bigger is simply better.
Bigger is not, however, better in every case. For example, the Fujifilm GFX100 has an even larger ‘medium format’ sensor (43.8×32.9mm) than the Nikon D6, but its pixel pitch is only 3.76 µm as it is capable of 102.0 effective megapixels. However, in some cases, it is preferable to have low pixel pitch. In this example the GFX100 is all about the resolution, whereas the D6 is all about light sensitivity. In other words, in this case bigger is about having more pixels, not about having high pixel pitch.
It is also worth keeping in mind that bigger sensors cost more to manufacture than smaller sensors, which means that the cameras that house large sensors are also going to be more expensive than cameras that house small sensors. A silicon wafer of a certain size can fit only a certain number of sensors. A manufacturing defect will therefore affect more large sensors than small sensors per silicon wafer due to their physical size. While the sensor size is not the only thing that affects the camera price, it does play a large role in it. For example, the Olympus OM-D EM1X costs some 2500€, the Nikon D6 costs some 7500€ and the Fujifilm GFX100 costs about 10 000€. In other words, bigger is not only (typically) better, but it is also (typically) much more expensive.
Large sensors also demand large lenses, which also tend to be expensive. I am going to explain this by comparing wide-angle lenses as they would be my first choice for doing landscape photography. They are also produced in fairly large quantities, meaning that their prices are reasonable and comparable between the brands. In comparison, telephoto lenses, especially supertelephoto lenses, tend to be more expensive as the demand for them is much lower.
A good wide-angle full frame lens costs anything between 500 to 700€, while excellent wide angle glass costs anything between 1000 to 3000€. Medium format wide-angle lenses tend to cost even more, and the selection is very limited. For example, there are two wide angle lenses for that Fujifilm camera, the cheaper option costing some 1800€ and the more expensive option costing some 2800€. The micro four thirds (MFT) Olympus wide angle lenses are much more affordable, costing a couple of hundred euro, and even the most expensive wide-angle lenses are more affordable, costing anything between 1000 to 1400€. Moreover, as the micro four thirds lens mount is shared by other manufacturers, the choice of lenses is broad (albeit some of the lens features might not work properly).
Bang for the buck
But what is the right camera for you? Well, that depends on what it is that you want to do with the camera. Even if you just need a camera for research purposes, you still need to figure what kind of research you will be conducting. If you will be using it solely on a tripod, you do not need a flagship camera, regardless of the camera sensor size. Therefore, the budget for your camera can be as low as 400 to 500€. You might even be able to find camera body and lens combo for that price.
Bigger is more expensive, or is it?
To be clear, the camera sensor size is worth keeping in mind at all times. In general, bigger is better, as already established. Then again bigger is generally more expensive, as also already established. How much more expensive?
To provide an example, you may be able to find a camera with an APS-C sized sensor (24x16mm) and a camera with a full frame (36x24mm) sensor for the same price. It would seem to make sense to opt for the full frame camera. However, you need to take more things into account than the sensor size.
Crucially, the bigger the sensor, the bigger the lenses need to be. You can, of course, use lenses designed for full frame cameras on APS-C cameras and vice versa, but when you use lenses designed for APS-C cameras on full frame cameras, you can only use them in a crop mode, utilizing only part of the potential of that bigger sensor. It makes more sense to buy an APS-C camera if you only have matching APS-C lenses. The point is that while full frame cameras are nowadays more affordable than what they used to be, you also need to be aware that the full frame lenses tend to be more expensive than APS-C lenses.
Medium format cameras that have even larger sensors than full frame cameras are much more expensive. Their lenses are also very expensive. I will not get into detail here, as this post is not about lenses, but to give you an idea of the costs, a micro four thirds or an APS-C body costs anything between 500€ to 2000€, depending on when the camera became available and the features it has. A full frame body costs anything between 1500€ to 9000€, with most bodies costing around 2000€ to 3000€ (the top end professional camera bodies cost about 6000€ and the prestige camera bodies cost anything between 7000 to 9000€). A medium format camera body is going to cost at least 5000€ (e.g., Fuji and Pentax), but there is no cap on how much these can cost.
The best value for the money is likely going to be found in the top-end APS-C camera bodies and in the affordable full frame camera bodies. You come across a great deal, a body and lens combo, in either of these segments and I would recommend opting for such deals. My tip is to go with whatever offers you the best bang for the buck. Of course, you’ll need to consider your budget and work within those limits.
Sensor technology
Sensor technology keeps getting better and better and, to be honest, it is kind of hard to keep track of the developments. My first DSLR has a charge-couple device (CCD) sensor, which, in my opinion, gives me wonderful colors, but it performs poorly in demanding conditions. You can use it at ISO 800 and still get good results, but that is about it, about all it can do, and I would rather use it at ISO 400. The more recent cameras I have house complementary metal–oxide–semiconductor (CMOS) sensors, which perform much better in demanding conditions. If you think that is confusing, you also need to take into consideration that the older generations of CMOS sensors are front-side illuminated (FSI), whereas the newer current generation CMOS sensors are back-side illuminated (BSI). The difference between FSI and BSI is in how the different components are arranged. It is not worth getting into, unless you are an engineer. The main thing is that BSI sensors provide better results than FSI sensors in demanding lighting conditions.
You can ignore all this if you are buying a new camera, but it is worth keeping in mind if you are buying a used camera. A used camera is a good option to consider as you may be able to buy a solid performer for a fraction of the price of a new camera. You do, however, need to trust the people you are dealing with. The camera warranty time may have expired, which means that you are on your own if the camera starts acting up. Anyway, you probably will not be buying a camera body housing a CCD sensor, but the existence of different CMOS technologies is worth keeping in mind if you are looking to buy a used camera body.
AA or no AA
It used to be the case that camera sensors were, by default, overlaid by an anti-aliasing (AA) filter. The purpose of this filter is to prevent distracting moiré patterns in your photos. As that may seem obscure, it is that warping pattern you can see on tightly patterned clothing and on walls in some photos. The tradeoff is that the filter makes everything just a little bit softer than they would be without the filter. Nowadays some cameras have this filter whereas others don’t have it.
Is there a noticeable difference in the image quality? Well, the thing is that it is hard to say whether it makes a much of a difference, one way or another, as there are other things that affect image sharpness as well. My most recent camera does not have it and it is, I would say, sharper than my previous cameras which do have it, but, then again, there are other factors that also affect the results. For example, a higher megapixel count helps to capture more detail, at least in good lighting conditions. Then there are differences between sensors, sensor technologies and the image processing, so I can’t really say anything conclusive about this.
Finding your way
It is worth keeping in mind that there is a shift from digital single-lens reflex cameras (DSLRs) to mirrorless interchangeable-lens cameras (MILCs). I will not be comprehensive here. I will only provide you a quick summary of the differences between the two.
The main difference between the two is that DSLRs have optical viewfinders (OVFs), whereas MILCs have electronic viewfinders (EVFs). Both have their advantages and disadvantages. Firstly, the DLSR OVF gives you what you see through the lens, whereas the MILC EVF gives you an image of it. The former gives you less information about how your photos will end up looking, whereas the latter gives you a rendition of the final image. In my opinion, this is a matter of preference. I prefer the OVF, but there are plenty of people who prefer the EVF. Both (current) types allow you to view the scene also from a small screen behind the camera, making them very similar in this respect. This feature is generally known as live view. Secondly, DSLRs tend to have a better battery life than the MILCs. Optical viewfinders are highly advantageous in this regard as they do not drain your battery while you look through the viewfinder, while you compose your image. Thirdly, MILCs tend to be smaller and lighter than the DSLRs as they do not need a mirror box and a chunky pentaprism on top of the camera. Fourthly, MILCs tend to be more suitable to videography than DLSRs.
There are, of course, also cameras that only have a screen in the back. These cameras are typically fairly compact, which gives them the advantage over DSLRs and MILCs. To achieve that compactness, they also tend to have fixed lenses, which simply means that you cannot change the lens. This is a disadvantage. The Ricoh GR series is a good example of these kinds of cameras.
To be fair, it is, in my opinion, a bit pointless to compare different types of cameras in order judge which of them is the best type of camera. They all come with their advantages and disadvantages. For example, compact cameras are purposely compact, which allows them to be used in certain ways. I own a Ricoh GR because it packs punch. It is light and it gets the job done. It is also very discreet, unlike larger cameras that draw attention once you take them out of your camera bag or backpack. Is it a perfect camera? No, it is not. It cannot do what my DSLRs can do. It certainly lacks versatility.
Other things to keep in mind
A camera is more than just the sensor or the viewfinder. Build quality might not affect your photos, but it does affect the way you use the camera. Plastic is plastic, whereas metal is metal. You can feel the difference. Plastic is, of course, lighter than metal, but, in my experience, it also feels like plastic. All my DSLRs have had a steel chassis and plastic and/or magnesium alloy shell on that chassis, which is why I have never really worried about durability. Then again, I handle my cameras with care. I pay for my cameras, so I treat them well.
Build quality is, however, more than just the materials used to house the camera sensor. Weather resistance is something that makes a difference if you take photos outdoors. While I generally do not take photos in harsh weather conditions, for example in heavy rain, proper weather sealing is useful to have. If you happen to be somewhere where it is, for example, raining all the time, you might end up waiting forever for a sunny day if your camera does not have weather sealing. Otherwise invest in an umbrella and avoid windy days.
Camera ergonomics is also something that is often overlooked. There is no right or wrong to this as different camera bodies work better for different people as all hands are not the same. My advice is to feel the camera in your hands before buying it, if possible. Camera bodies are made for right-handed people, which means that the camera grip is going to be on the right-hand side. Get a good grip of the camera with your right hand. The point here is to get a feel of the camera, how well you can grasp it. While this will not affect the image quality, a good grip is a good grip. This might not be on the top of your list, I understand that, but it makes a world of difference to handle a camera that suits your hands as opposed to handling a camera that suits no one’s hands. In my experience, there are a lot of cameras that have poorly designed grips. It is, as if, they just went with whatever, instead of designing it and testing it on actual people. I also recommend testing how well your right-hand fingers can reach the various buttons and dials while gripping the camera. If your thumb and index fingers can reach them while maintaining a good grip, great. If not, not so great. This is also something that is often ignored by the manufacturers, as if none ever stopped for a moment to point how impractical the design is for the photographer.
Related to ergonomics, bigger is also not always simply better. Large cameras tend to be heavy, which means carrying them around is going to be a chore. At first it may seem that you should simply get the biggest and the best performing camera, but, in my experience, handling a big camera is dreadful. Moreover, having to carry a heavy camera and heavy lenses is also dreadful.
Stabilization might not be the most important thing in a camera body as photographers have managed to do just fine without it. Some cameras have in-body image stabilization (IBIS), which helps you when you are in a pinch, when you have to shoot handheld with low shutters speeds. The sensor basically floats in the body, moving around, which allows it to be fixed in place, while any the movement caused by your hands is countered by that float. In my experience, IBIS does work quite well, as intended, but don’t expect it to work wonders. It has its limits. You still have to stay as still as possible. In good lighting IBIS will not do anything for you, but it is still a nice feature to have. You would think that there is enough light wherever you happen to be, but that is often not the case, which means that you will need to make some compromises. You can bump up the sensor sensitivity to get a faster shutter speed, but that IBIS might be just the thing that makes that unnecessary. IBIS might also be available in the camera video mode, which is where, in my opinion, it really helps you to get good footage.
Memory card slots might seem like something that is not even worth mentioning, but if you really need to make sure that you accomplish what you set out to do, having dual memory card slots is important. Why? Well, I have only had one memory card fail on me during operation, corrupting the data. It was not the end of the world, but I did end up losing something that I could not photograph again as I was covering an event. Having two memory card slots allows you to save the photos on both cards, so that if one of them fails, corrupting the data, you still have a backup card. I would say that in research this kind of redundancy is something you should take into consideration and prioritize it over many other features.
Ignore the buzz
If there is something that you should be aware of, it is marketing. The manufacturers want you to buy their products, not the products of some other manufacturers. The differences are often minute between the manufacturers, but, of course, it is not in their best interest to tell you that. They like to throw a lot of jargon and impressive numbers at you, to make sure that you are impressed by their products. Do not be fooled by that.
The manufacturers used to emphasize the megapixels, but I would say that is no longer the case. Now they like to boast on things like the backscreen resolution, not in a way that makes any sense, indicating the resolution like we do with TV and computer screens, like 1920×1080, but in a way that makes no sense, whatsoever, indicating how many millions of dots there are on that screen. For example, 920 000 dots means that the screen resolution is meager 640×480, which is old school VGA resolution. The backscreen of my latest DSLR has just a bit over one million dots, which may seem to be impressive, being over a million, but that is still in the VGA territory. To be clear, that is fine, as most work on the photos is done on a computer screen and not on such a tiny screen.
Bottom line
I did not cover everything that is relevant to buying a camera body. Most importantly, I glossed over the selection of lenses, which vary, brand by brand, as does the price of those lenses and their compability with older camera bodies. I left that out as I believe that it warrants a separate and a more dedicated discussion. There are also many features, such as frames per second (FPS), high dynamic range (HDR), pixel shift, horizon correction, interval shooting, exposure bracketing, averaging, that I did not even mention. All of these do, of course, matter. I did not, however, go through them as they are only important to the extent that you have use for such features. In most cases you will not be using them and therefore I did not cover them.
Photography and videography both rely on light. Simply put, no light, no photos, no videos. You can try this by going to a room with no windows, nor skylights. Close the door behind you and try to take a photo or some video. Your device may use some sort of light or a flash, but that already should make you aware of the issue. In some cases there may be too much light, but in most cases the issue that you will encounter is having too little light.
It is possible to do use a camera without much knowledge it functions. However, the more demanding the situation is, the more you will benefit from knowing how a camera functions. This is especially the case in low light conditions, which is why I believe it is worth it to start from the beginning, or so to speak.
I will first explain the basics in photography, followed by explaining the same things using videography specific terms. I will not flood you with camera jargon. While it is beneficial to know just about everything that there is to know about how cameras work, you do not need a degree in physics to get the job done. There are, of course, also all kinds of exceptions, but I will gloss over such as it is unlikely that you will be concerned by them.
At this stage I won’t specify what devices you can use as that is beside the point as all cameras function the same way. What you need to know is that your camera is sensitive to light and your job is to control how much or little light enters your camera. There are three ways of controlling it: sensor light sensitivity, lens aperture, and shutter speed.
Sensitivity
Instead of film, digital cameras have sensors.These sensors have a base sensitivity, typically referred to by its ISO-value. In the film days this was known as the ASA-value. The base ISO-value is typically 100. The sensor sensitivity can be adjusted. It is typically set as 100, 200, 400, 800, 1600, 3200, 6400, 12 800 and so on and so forth, so that the relevant value is doubled each time, as you can see. Think of it as amplification.
The problem with running the camera sensor on higher sensitivities is that it results in noise. The photos will have certain roughness to them. It can, of course, be remedied by applying noise reduction (NR). This can be done in the camera, using its own software, or on a computer, using the software you happen to have. Some cameras or, rather, their sensors handle noise better than others. In general, the newer cameras tend to handle noise better than the older ones, and the bigger the sensor, the better the results.
Noise used to be more of a problem, so that the best you could pull off was ISO 800 and the results were not exactly spectacular. This limited you to ISO 400, which meant that you really needed ideal lighting conditions. This is, however, no longer the case and you can now go up to ISO 6400, give or take, and, in some cases, even up to ISO 12 800, and get very good results.
Using the higher sensitivities also reduces the dynamic range (DR) of the camera sensor output. The maximum DR of a camera is typically 14-bits, but the more you increase the sensitivity, the more that DR is reduced. What does it do to your images then? Well, simply put, it reduces the shades of grey. In other words, think of going from black to white but having less distinct shades of grey in between. The reduction of DR is not ideal, but there are cases where increasing the sensitivity is your only option to get properly exposed photos. Some cameras handle this issue better than others, giving you higher DR at higher sensitivities than others.
In the world of videography sensitivity is referred to as gain. It is functionally the same. The ISO-values are just about providing you standardized values, hence the reference to ISO, short for International Organization for Standardization.
Aperture
Cameras rely on lenses. They have adjustable apertures, which control how much light enters the camera body and reaches the camera sensor. Lenses have adjustable aperture blades that form a circular shape also known as a diaphragm. Closing the aperture lets in less light. This is known as stopping down. Opening the aperture lets in more light. This is known as opening up. In photography, you work with the so called f-numbers, marked by an f, indicating the ratio between the lens focal length and the aperture, which, in turn allows you to calculate the diameter of the opening itself.
For example, a lens marketed as 50mm and f/2 has the maximum opening of 25mm. If you close the aperture, stopping it down, as they say, to f/2.8, the opening is now only 17,86mm. The f-numbers are typically indicated as 1, 1.4, 2, 2.8, 4, 5.6, 8, 11, 16 and 32. The ratio between these numbers is always 1.4, so that 1 leads to 1.4, which in turn leads to 2 and so on and so forth. Note how the ratio between f-numbers is not 2. How can this be if the ratio between sensitivity values is always 2? Well, you have to keep in mind that the area that is open is an area. If we go from f/2 to f/2.8 on a 50mm lens means that the area is reduced from approximately 491 sq mm to 250 sq mm. If we go from f/2.8 to f/4, the area is further reduced from 250 sq mm to 123 sq mm. As you can see, the ratio of the area is 2. It is actually very close to it, but do not blame me for that. I did not invent this system. It is close enough.
In practice, what you need to remember is that going from one f-number to the next f-number always either doubles or halves the light entering the camera sensor. So, you can double or halve the light coming in by opening up or stopping down once, by what they call one stop. To achieve the same, you can go double or halve the ISO-value.
In videography aperture is typically referred to as the iris. Again, all you need to know that this is functionally the same thing as the aperture. If you end up using cinema cameras and/or cinema lenses, then you will encounter lenses that allow the opening, i.e., the iris, to be controlled smoothly, without preset clicks, and measurements indicated by their t-number, indicating how much light gets through the lens to the sensor rather than giving you an approximation based on an equation. The t-number system is not inherently better than the f-number system. What it does, however, is to offer convenience. It allows the same scene to be shot with different lenses without the hassle of having to check the exposure of the footage in post processing, to match the footage, as each lens with the same t-value provides you the same exposure, regardless of the lenses you have used.
Shutter speed
Cameras also have shutters. They act as mechanical curtains that open and close in front of the camera sensor or film, exposing it to light. The longer these curtains stay open, the more light enters the sensor or the film. The shorter these curtains stay open, the less light enters the sensor or the film. By adjusting the shutter speed, you always double or halve the exposure time. For example, if your shutter speedis set at 1 second you double the incoming light by doubling the exposure time, setting the shutter speed at 2 seconds, and you halve the incoming light by halving the exposure time, setting the shutter speed at 0.5 seconds.
The sensors can also act as a shutter by activating only for a specific time. This option is known as using an electronic shutter. The function is the same as it is in a mechanical shutter. There is just no mechanical curtain exposing the sensor to light.
What you also need to know about shutter speeds is that you need fast shutter speeds to stop motion. How fast shutter speed is needed depends on how fast what you focus is moving. In general, you need something like 1/50 second to 1/100 second shutter speed. You might be able to pull off even slower shutter speeds, especially if you are just photographing static objects. If you are inexperienced, your hands will, however, most likely shake a bit, causing blurry images at slow shutter speeds. This also affects videography. Some cameras have in-body image stabilization (IBIS) and some lenses have optical image stabilization (OIS), which counter shaky hands. They do not, however, counter other types of motion blur. You still need fast shutter speeds for that purpose.
Control
As you can see, adjusting the sensitivity, the aperture or the shutter speed doubles or halves in amount of light that makes it way to the camera sensor. I explained them in stops, also known as full exposure values (EVs), to make more sense of them. Modern cameras do, however, allow you to adjust these in smaller increments, typically in half (1/2 EV) or one third (1/3 EV) stop increments. As lighting conditions vary quite considerably and in smaller increments, this allows you more options to work with in order to get the right exposure.
Neutral density filters
There is one additional common way of altering how much light reaches the camera sensor. Adding filters on the camera lens is a common way of altering photographs. I will not cover all the filters, for example polarizers. I will only focus on the so called neutral density (ND) filters as their sole function is to reduce the incoming light. On most days you do not need ND filters. There are three main uses that I can think of.
Firstly, you will need to rely on these filters if you want to take long exposure photos on sunny days. Why? Well, the camera sensor sensitivity has a floor, meaning that it cannot be less sensitive to light than that. That value is typically ISO 100, but some cameras go down to ISO 80 and ISO 50. On bright days closing the aperture, i.e., stopping down, cuts down the light only so much. This means that the only option that you are left with is adjusting the shutter speed, opting for a shorter exposure. However, in this case that is the exact opposite that you want to achieve. But why would you want to take long exposure photos on sunny days? Well, perhaps you want to take a photo of a river or a waterfall, creating a smooth, blurred effect. This is where ND filters save the day.
Secondly, cameras suffer what is known as diffraction. This is a bit too complex issue to explain and frankly unnecessary for you to know. All you need to know is that closing down the aperture beyond a certain threshold causes the light to diffract, i.e., disperse, in a way that is detrimental to the image quality. If you shoot with an open aperture, light enters the camera perpendicularly, i.e., hitting the camera sensor dead on. If you stop down, some of that light enters the camera perpendicularly, as you would want it to, but some if does not, entering it in a different angle and bouncing around. Simply put, your photo won’t be as sharp as it could be if stop down beyond a certain limit. The limit is typically at f/8 or f/11, but it is hard to say where things start to deteriorate as this depends on your camera sensor and there may also be other issues with your camera lenses that cause the image to degrade. I would say things take a turn for the worse at around f/16.
ND filters allow you to get the best out of your camera and your lens on sunny days, when you want be right at the limit, while using the lowest sensitivity setting. This is, of course, related to the first case as you probably want a longer exposure. This is, however, a slightly different issue. You might also be very close to the optimal settings, but just need to cut a stop or two get there, which is where the ND filters come in handy.
Thirdly, you will also need to rely on these filters if you want to shoot with an open aperture on a sunny day, while combining it with a specific shutter speed. When would you need such? In my experience, you rarely run into this issue in photography. This is, however, a common issue in videography, where too short exposure times are generally not desirable. For example, if you want to shoot video at 25 frames per second (FPS), you get the most pleasing outcome by setting the shutter speed to 1/50 second. Similarly, if you want to shoot video at 50 FPS, you get the most pleasing outcome by setting the shutter speed to 1/100 second. But why would you need to shoot at an open aperture? Why not simple stop down so that you can set the recommended shutter speed? This is connected to another thing that I need to cover.
The lens aperture not only allows you to control how much light enters the camera, but, unlike the sensitivity and the shutter speed settings, it controls the depth of field (DOF), which is the distance between the closest and the farthest object that appear sharp in photo or in a sequence of video. This is also unnecessary to explain in detail. All you need to know is that the more open your aperture is, the shallower the depth of field tends to be, depending on other factors, such as the lens focal length, distance to the subject, i.e., what it is that you focus on, and the more closed your aperture is, the deeper the depth of field tends to be. You’ll want a shallow depth of field to separate what you want to be in focus from what you do not want to be focus. You probably want a shallow depth of field when focusing on a person, for example in portrait photography. Conversely, you probably want a deep depth of field when focusing on the whole scene, for example in landscape photography. Telephoto lenses tend to be best suited for the former, whereas wide angle lenses tend to be best suited for the latter.
To make more sense of the benefit of using ND filters when shooting video, you may want to isolate what you focus on, typically a person, more specifically his or her face, from everything else. If you shoot video on a sunny day, you want that 1/50 or 1/100 shutter speed, but now you also want that open aperture to isolate what you focus on from everything else. You probably already operate at the lowest sensitivity setting, which means that you need set a shorter exposure time or adjust the aperture or limit the incoming light in other ways. This is also where ND filters save the day.
This is also relevant to those cases where you have an abundance of light, simply too much of it, but want to pan on what you are focusing on. For example, if you are taking photos of a football player on the move, but want to create partial motion blur, so that most of his or her body looks like it is in motion, while the face and the upper body is in focus, you will need ND filters. Simply put, you will need these filters if you want to isolate the player from the background.
Exposure
Knowing how sensitivity, aperture and shutter speed affects exposure allows you to control your camera. Most cameras digital single-lens reflex cameras (DSLRs) and mirrorless interchangeable-lens cameras (MILCs) have multiple modes. You typically begin by setting the ISO-value. The auto mode does all the work for you, but it may not give you the settings you want. For example, you may wish to have deeper or shallower depth of field than what your camera provides in the auto mode. The semi-auto or priority modes make you control either aperture or the shutter speed, while calculating the other for you on the basis the ISO-value that you have set. These modes are handy if all you want is to make sure that your depth of field is this deep or shallow or that you either get or do not get any motion blur. There is less fiddling with the settings. Some cameras also allow you to control both at the same time, like in the manual mode, but calculate the ISO-value for you, either from the full range of sensitivities that the camera can pull off or from a range that the photographer finds useful for this purpose. This can also be fine tuned to prioritize lower or higher sensitivities. The manual mode makes you do all the work, setting the ISO-value, followed by controlling the exposure with the aperture and shutter speed settings. There is typically a +/- indicator which shows whether you are over- or under-exposing the photo.
Cameras also allow you to measure and suggest the correct exposure in different ways. Typically, you have settings that base the suggested correct exposure on the whole scene, what the sensor is provided, prioritizing the central part of the scene or just the very center of the scene. This won’t affect your photos, as such. It only helps you to get good results. For example, you may have a brightly lit room, but you are focusing on a very dark object. To make sure that you can see the details on that very dark object, you need to set your exposure according to that object, not on the otherwise brightly lit room. You would, of course, get to the results you want by simply changing the settings until you get the results you wanted, but you get to those results faster if you use the camera settings to your advantage.
The auto and priority modes can also be fine tuned by setting exposure compensation (EV compensation). This simply means that you set your camera to over or under-exposure by this or that much, for example by 1/3, 1/2 or 1 EV. Cameras may struggle in certain lighting conditions, resulting in over or under-exposed photos. Setting the EV compensation allows you to override the system, altering the calculations, to provide you the correct exposures.
Summary
Being able to control your camera not might not be needed in most cases, but it is certainly useful in demanding lighting conditions. Taking photos and/or video in low light conditions is particularly challenging. It would be tempting to simply rely on your camera, hoping that it can pull off whatever it is that you are trying to achieve. However, it is only likely that you will need to make a lot of compromises with the settings, especially if you are hoping to take photos handheld, which is why knowing what affects what will help you tremendously.
I did not cover any specifics, for example which cameras and lenses you might want to consider, nor which accessories you might also want to consider. There is no right or wrong way to go about it. The cameras produced by well known manufacturers are all good enough for the job, as long as you know what you are doing. Some are, of course, more suitable to demanding low light conditions than others, which is especially the case if you want do video, but I will write another post to cover these aspects.
I opted to create a new site for a new project, which may or may not get funded and may or may not get published. Nightscapes or landscapes at night started as a sideproject that I came up with while I was working on my doctoral thesis. I had grown weary of my main project and I wanted something to do something new. I knew it had to be something challenging, something that others have not done and/or are not willing to do.
To my knowledge, no one has focused on the linguistic or semiotic elements in the landscape at nighttime or, to be more specific, when it gets dark. To be clear, there are some articles, book chapters and books written on nightscapes, but none of them focus on what I am interested in, which is why I thought it would be worth investigating. There are many reasons for this the low number of existing studies.
I think the main reason for the lack of existing studies on nightscapes has to do with the difficulty involved in studies landscapes in the dark. Firstly, it is one thing to take photos or video in daylight and another thing to do that when it gets dark. It is not impossible but it is more demanding. It requires more expertise in photography and/or videography and the appropriate gear to get the job done. In my opinion, this is the hardest issue to overcome as you have to be quite invested in photography and/or videography to be able to do it in low light conditions. Secondly, working at nighttime is not for everyone. You have to be willing to work at night, which is not very appealing to people, especially if the weather conditions are far from ideal. This issue is fairly easy to overcome as you just need to be willing to do it. Thirdly, some areas are more dangerous or we think they are more dangerous after it gets dark. Daylight conditions provide a sense of security. This issue is also fairly easy to overcome. Working as a team will provide more security. Then again, the more people you need, the more they need to be willing to participate and have an actual role in the team. Something tells me that there are not many people interested in just carrying your tripod. Fourthly, doing something new, something that you are not familiar with, something that is challenging, inconvenient and possibly even dangerous in some circumstances is not exactly something that appeals to the many.
This is simply an introduction to this. I have briefly discussed these issues in an essay, three years ago, in a free-flowing manner, as I prefer, but I will expand on that in this blog. I will try to keep things neat and focus on specific topic each time. I hope to address many of the problems related to photography and videography, explaining things, step-by-step. An experienced photographer and/or videographer probably won’t benefit from it, but the less experienced individuals may benefit from such. I am not sure yet whether I will compile all that into a single post, editing it to include more and more, while also keeping it in order, so that it is easy to find what you might be interested in, or do it post by post. I will also try to cover existing studies in various fields or disciplines, to the extent they are relevant to my own project.